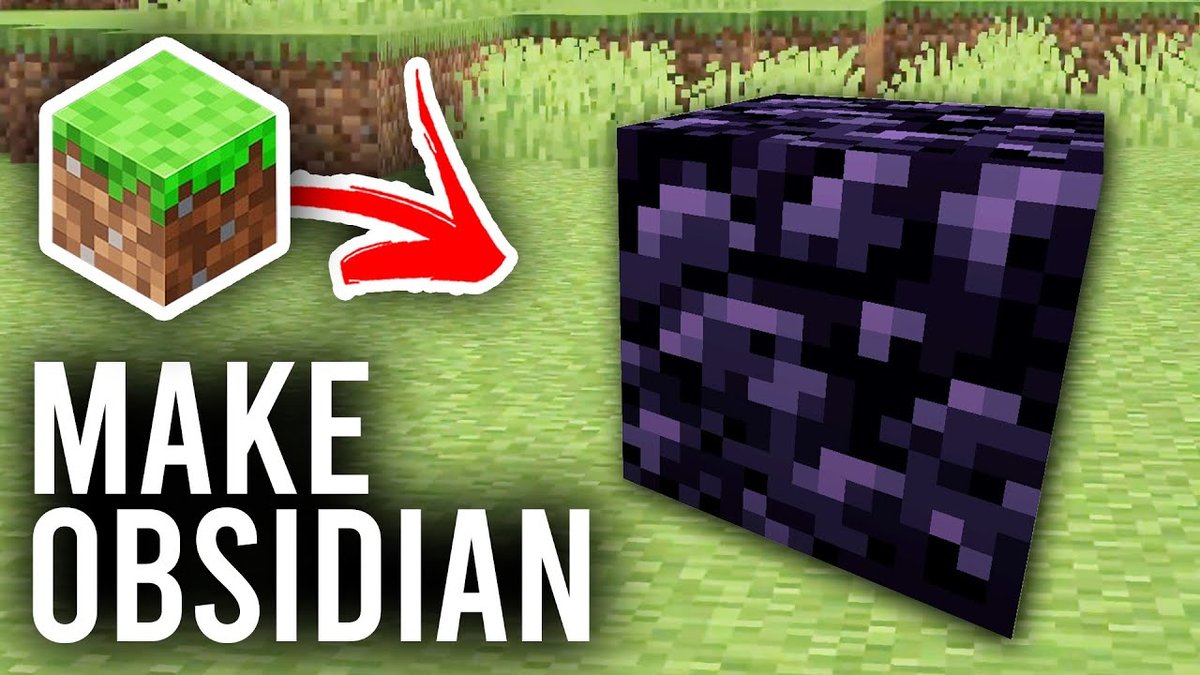
You've delved deep into the blocky world of Minecraft, perhaps stumbled upon a shimmering, purplish block, or maybe you're simply ready to conquer the Nether. Either way, understanding Obsidian formation mechanics in Minecraft isn't just a niche topic for enthusiasts—it's a critical skill that unlocks entirely new dimensions of gameplay. This isn't just about pouring water on lava; it's about mastering a fundamental process that acts as a gateway to powerful enchantments, interdimensional travel, and unparalleled defense.
Obsidian, a deep, dark igneous rock, is Minecraft's answer to ultimate durability. With its incredibly high resistance to explosions, it's not just decorative; it's your frontline defense against rampaging Creepers, the destructive might of the Wither Boss, and even the explosive payload of a rogue TNT cannon. More profoundly, it’s the very material that forms the iconic Nether Portal, your ticket to a realm of fire and adventure, and a prerequisite for journeying to The End. Without Obsidian, your Minecraft journey hits an impassable wall.
At a Glance: What You'll Learn About Obsidian
- Formation Basics: Obsidian forms when flowing water touches a lava source block (not flowing lava).
- Mining Tools: You need a Diamond or Netherite Pickaxe to collect Obsidian; weaker tools won't drop the item.
- Speed Mining: Enchanting your pickaxe with Efficiency V and getting the Haste II status effect makes mining nearly instant.
- "No Pickaxe" Portals: You can construct a Nether Portal using lava casting, pouring liquids into a temporary mold.
- Natural Sources: Find Obsidian in End Pillars, Ruined Portals, Trial Chambers, and sometimes chests in specific structures.
- Crying Obsidian: A special variant that emits light and can't be made with water and lava; essential for the Respawn Anchor.
- Key Crafting: Obsidian is crucial for Enchanting Tables, Ender Chests, and Beacon bases.
- Ultimate Defense: Its high blast resistance makes it perfect for anti-explosion structures.
The Fundamental Recipe: Water Meets a Lava Source
At its core, the creation of Obsidian in Minecraft is a beautifully simple yet often misunderstood chemical reaction (or, well, game mechanic). It all boils down to two elements: water and a lava source block.
Imagine a natural lava pool, perhaps deep underground at Y-Level -54, or bubbling ominously on the surface of a volcanic biome. These pools are comprised mostly of static "source" blocks of lava. When flowing water comes into contact with one of these static lava source blocks, the magic happens: the lava instantly solidifies into Obsidian.
Source vs. Flowing: A Critical Distinction
This is where many players first go wrong. Not all lava or water is created equal in this process:
- Lava Source Block: This is the key. A lava source block is a static block of lava that, if disturbed, would regenerate or flow out indefinitely. Think of it as the "origin point" of a lava stream.
- Flowing Lava: This is lava that has spread out from a source block. If flowing water touches flowing lava, you won't get Obsidian. Instead, you'll get Cobblestone, a far less valuable block.
- Water Source Block: To initiate the Obsidian formation, you need a full water source block, typically carried in a bucket. A water bottle won't suffice.
- Flowing Water: When you place a water source block, the water flows outwards. It's this flowing water that needs to touch the lava source block.
To put it plainly: place a water bucket next to a static block of lava, and you'll get Obsidian. Drop a bucket of water into a large lava lake, and you'll solidify the edges of the lava pool into Obsidian, as the flowing water interacts with the stationary lava source blocks.
Where to Find Lava Naturally
Before you can turn lava into Obsidian, you need to find it. Natural lava sources typically appear in a few key locations:
- Underground Aquifers: These vast networks of underground caves often contain extensive lava lakes, especially at lower Y-levels (around Y-level -54 and below).
- Lava Pools: Surface-level lava pools can sometimes be found in specific biomes, though they are less common and often smaller than their underground counterparts.
- The Nether: The Nether dimension is practically swimming in lava, making it an excellent, albeit dangerous, place to find abundant lava sources.
Always carry an empty bucket and a water bucket when exploring, especially at lower Y-levels. This simple preparedness allows you to instantly convert any encountered lava source into a valuable Obsidian block.
Equipping for the Harvest: Mining Obsidian
Once you've successfully created Obsidian, your next challenge is to collect it. Obsidian is exceptionally tough, and not just any pickaxe will do the job.
The Right Tools for the Job
To successfully mine and collect Obsidian, you need one of two specific tools:
- Diamond Pickaxe: This is the minimum requirement. A standard Diamond Pickaxe will allow you to break Obsidian and drop it as an item.
- Netherite Pickaxe: The superior option. A Netherite Pickaxe offers faster mining speed and greater durability.
Attempting to mine Obsidian with weaker tools—such as a Stone Pickaxe, Iron Pickaxe, or Gold Pickaxe—will result in the block breaking but not dropping anything. You'll just destroy the block without getting the item, a frustrating waste of effort.
Mining Speeds: From Basic to Blazingly Fast
Even with the correct tool, mining Obsidian takes time. Here's a quick breakdown of mining speeds:
- Standard Diamond Pickaxe: Approximately 9.4 seconds per block.
- Standard Netherite Pickaxe: Approximately 8.4 seconds per block.
These times can feel agonizingly slow when you need a dozen blocks for a Nether Portal. Thankfully, enchantments and status effects can drastically reduce this mining duration.
Achieving Nearly Instant Obsidian Mining
For true efficiency, you'll want to optimize your pickaxe:
- Efficiency V Enchantment: This enchantment, applied to either a Diamond or Netherite Pickaxe, significantly boosts mining speed.
- Haste II Status Effect: Gained from a powered Beacon (with a base made of iron, gold, diamond, or emerald blocks), this effect provides another substantial speed boost.
When you combine a Netherite Pickaxe enchanted with Efficiency V and are under the influence of Haste II, you can mine Obsidian in less than one second. This setup transforms Obsidian collection from a tedious chore into a rapid-fire process, essential for large-scale projects or when you want to create your own obsidian generator for bulk production.
Beyond the Pickaxe: Crafting Obsidian Without Mining
What if you're fresh into a world, haven't found diamonds yet, but desperately need Obsidian for a Nether Portal? Minecraft offers an ingenious workaround: lava casting. This technique allows you to "mold" Obsidian blocks directly into the shape of a portal frame, eliminating the need for a diamond pickaxe entirely.
Lava Casting for Nether Portals
Lava casting relies on the fundamental formation mechanic (water on lava source blocks) but in a controlled, strategic manner. You essentially build a temporary mold for your portal frame using easily obtainable blocks like dirt or cobblestone, then carefully pour lava and water into it.
Step-by-Step Lava Casting for a Nether Portal
- Gather Materials:
- At least 10 buckets of lava (you'll need to fill and empty your bucket repeatedly, so a single bucket to scoop lava is fine).
- At least 1 water bucket.
- ~20-30 temporary blocks (dirt, cobblestone, gravel).
- Flint and Steel (to light the portal once built).
- Build Your Mold:
- A Nether Portal frame is 4 blocks wide and 5 blocks high externally, with the corners being optional (though they save Obsidian, it's safer to build them for the mold). This means you need 14 Obsidian blocks for a full frame, or 10 if you omit corners.
- Construct a 4x5 rectangular frame using your temporary blocks. Ensure it's hollow in the middle.
- Crucially, create a small, temporary platform or trench above where your lava will sit, to strategically place your water.
- Pour the Lava:
- Carefully place lava source blocks within your temporary frame where you want the Obsidian to form. Fill the bottom layer first, then the sides. You can place lava on the ground next to your mold, letting it flow into the temporary frame.
- Introduce the Water:
- Once the lava sources are in place, retrieve your water bucket.
- From a higher, safe position (e.g., on top of your temporary mold), pour your water source block. The water should flow downwards, making contact with the lava source blocks you've placed.
- As the water flows over each lava source, it will instantly convert into Obsidian.
- Clean Up and Light:
- Once all desired Obsidian blocks have formed, pick up your water source with the empty bucket.
- Remove the temporary blocks. You should be left with a perfectly formed Obsidian Nether Portal frame.
- Light the inner frame with Flint and Steel or a Fire Charge, and your portal is ready!
This method requires patience and precision, but it's a game-changer for early-game progression.
Navigating Lava Pools with Wind Charges (1.21/1.22 Updates)
For those playing on more recent Minecraft versions (1.21 or 1.22 and beyond), Wind Charges offer a unique and surprisingly safe way to interact with lava pools, particularly useful for lava casting in treacherous environments.
Here's the trick:
- Place a temporary block at the edge of a lava pool.
- Stand on that block.
- Jump and immediately fire a Wind Charge slightly downwards and away from you. The charge's blast will launch you across the lava, often allowing you to reach new sections or even cross entire pools without touching the molten rock.
This allows for safer placement of water buckets from a distance or quick escapes after placing lava blocks, minimizing the risk of falling in.
Scavenger's Guide: Natural Obsidian Sources
While creating Obsidian is a reliable method, sometimes the fastest way to get a few blocks is to find them already formed in the world. Minecraft offers several natural sources of Obsidian, though some are more readily accessible than others.
The End Pillars
Upon entering The End dimension and facing the Ender Dragon, you'll immediately notice the massive, towering structures known as End Pillars (or Obsidian Spikes). These pillars are entirely made of Obsidian. After defeating the Ender Dragon, these pillars become an invaluable source of hundreds of Obsidian blocks.
- Tip: This is one of the most efficient natural sources for bulk Obsidian, especially with a Netherite Pickaxe enchanted with Efficiency V. Consider building a temporary bridge to the top of these pillars for safer, more efficient mining.
Trial Chambers (1.21/1.22 Updates)
For players on recent updates, Trial Chambers offer another exciting way to acquire Obsidian. Found deep underground, these challenging structures reward victorious adventurers.
- How to get it: After defeating waves of mobs summoned by Trial Spawners, you can use a Trial Key on Vaults or an Ominous Key on Ominous Vaults. These special chests have a chance to yield Obsidian blocks as part of their loot.
Ruined Portals
Scattered across both the Overworld and The Nether, Ruined Portals are partially complete Nether Portal frames. These structures are excellent early-game finds for Obsidian.
- What to expect: They usually contain a few Obsidian blocks still forming their frame, and sometimes a nearby chest will hold additional pieces. This is often the first place new players encounter Obsidian.
Bastion Remnants (Nether)
Deep within The Nether, Bastion Remnants are formidable fortress-like structures inhabited by Piglins. While extremely dangerous, their chests can occasionally contain Obsidian.
- Caution: These are high-risk, high-reward locations. Be prepared for combat with Piglins (wear gold armor!) and other Nether hazards.
Village Blacksmiths
In the Overworld, some Desert Villages feature blacksmith buildings. The chests within these buildings have a small chance to contain a few pieces of Obsidian. It's not a reliable source for large quantities, but it's a nice bonus if you're exploring villages.
Scaling Up: Building Obsidian Generators
For players who need vast quantities of Obsidian for massive builds, blast-proof bases, or extensive portal networks, natural generation isn't enough. This is where Obsidian generators come into play. These clever contraptions leverage game mechanics (and sometimes glitches) to produce Obsidian quickly and repeatedly.
The End Spawn Platform Trick
One of the most popular and efficient bulk Obsidian farming methods involves The End dimension's Spawn Platform.
- The Mechanic: When a player first enters The End, a 25-block Obsidian platform is generated. If this platform is somehow removed or a new player enters, it can regenerate.
- The Trick: Advanced players or those with multiple accounts can rapidly enter and leave The End. By using a secondary account or specific Ender Pearl teleportation tricks, the game can be "convinced" to regenerate this platform very quickly (sometimes every 30 seconds). By mining these regenerated platforms, you can get a consistent stream of Obsidian.
Redstone Glitch Generators
Some advanced Obsidian generators utilize Redstone and pistons to exploit specific game glitches or mechanics related to Nether Portal frame regeneration. These designs are often complex and version-dependent, relying on precise timing and block updates to trick the game into generating Obsidian blocks in a loop.
- Note: These generators can be highly efficient but often require a deep understanding of Redstone and Minecraft's internal mechanics. If you're looking to delve into these complex designs, you'll definitely want to explore guides on how to create your own obsidian generator tailored to specific game versions.
Automated Crafter for Lava Casting (1.21/1.22 Updates)
The introduction of the Automated Crafter in recent updates has made large-scale lava casting significantly easier, bridging the gap between manual creation and fully automated generators.
- How it works: By setting up a system where lava is collected in cauldrons using Pointed Dripstone, and then funneled into an Automated Crafter alongside empty buckets, you can instantly prepare lava-filled buckets. A similar setup can be used for water.
- Benefits: This allows for continuous, high-volume lava casting. While not fully automated Obsidian generation, it streamlines the bucket-filling process, making manual casting far less tedious and much faster for bulk production.
A Different Shade: Understanding Crying Obsidian
Before you get carried away turning every lava pool into purple blocks, it's vital to distinguish between regular Obsidian and Crying Obsidian. While similar in appearance (both are dark and purplish), Crying Obsidian has distinct properties, formation methods, and uses.
How Crying Obsidian is Different
- Light-Emitting: Unlike regular Obsidian, Crying Obsidian emits a light level of 10, giving off a subtle glow.
- Formation: Crucially, Crying Obsidian cannot be made by combining water and lava. Its formation mechanism is entirely separate.
- Nether Portal Frames: Despite its similar appearance, Crying Obsidian cannot be used to build a Nether Portal frame. You must use regular Obsidian for this purpose.
Sources of Crying Obsidian
Since you can't create it with water and lava, where do you find Crying Obsidian?
- Piglins Bartering: The most common source. In The Nether, if you toss a gold ingot to a Piglin, it will pick it up, inspect it, and then drop a random item in return. Crying Obsidian is one of the possible items you can receive.
- Ruined Portal Frames/Chests: Just like regular Obsidian, Crying Obsidian can sometimes be found integrated into the frames of Ruined Portals, or occasionally in their nearby chests.
- Ominous Vaults (Trial Chambers, 1.21/1.22): In updated versions, Ominous Vaults found in Trial Chambers (opened with an Ominous Key) also have a chance to contain Crying Obsidian.
Crafting the Respawn Anchor
The primary (and arguably most important) use for Crying Obsidian is to craft the Respawn Anchor.
- Purpose: The Respawn Anchor allows you to set a spawn point within The Nether or The End. This is incredibly useful for long expeditions, dangerous boss fights, or just avoiding endless trips through the portal.
- Recipe: The crafting recipe for a Respawn Anchor is straightforward:
- Place three Glowstone blocks across the top row of your crafting grid.
- Fill the remaining six slots with Crying Obsidian blocks.
- Usage: To use the Respawn Anchor, place it in The Nether or The End, then right-click it with Glowstone blocks. Each Glowstone block "charges" the anchor, allowing for one respawn. It can hold up to four charges.
- Critical Pitfall: NEVER attempt to use a Respawn Anchor in the Overworld. If you try to charge or use it in the Overworld, it will explode violently, destroying nearby blocks and potentially harming you.
Why Obsidian Matters: Essential Crafting & Strategic Uses
Beyond being a portal component, Obsidian is a powerhouse material in Minecraft, central to several high-tier crafting recipes and offering unparalleled defensive capabilities.
Essential Crafting Recipes
- Enchanting Table: This is perhaps the most crucial item requiring Obsidian. To craft an Enchanting Table, you need:
- 4 Obsidian blocks
- 2 Diamonds
- 1 Book of Knowledge
Without Obsidian, you cannot enchant your tools, weapons, and armor, severely limiting your power progression.
- Ender Chest: For secure, portable storage that you can access from anywhere, the Ender Chest is invaluable. Its recipe calls for:
- 8 Obsidian blocks
- 1 Eye of Ender
This item allows you to carry your most precious loot safely, knowing it won't be lost if you die (as it's linked to your player, not the specific chest).
- Beacon Base: Beacons provide powerful status effects to players in their vicinity. To activate a Beacon, it must be placed on top of a pyramid structure built from specific mineral blocks. While Iron, Gold, Diamond, or Emerald blocks form the bulk of the pyramid, Obsidian is listed as a potential block for the base in specific contexts, but more commonly, it's the Nether Star (obtained from the Wither) that activates the beacon itself. The actual pyramid blocks are typically high-value ores.
Blast Resistance and Defense
Obsidian boasts the highest blast resistance of any block obtainable in Survival mode (aside from Bedrock, which is unbreakable). This property makes it an ideal material for:
- Anti-Explosion Walls: Protect your bases, storage rooms, and valuable builds from Creeper explosions, TNT cannons, and even the devastating blasts of the Wither Boss. Only the extremely powerful explosion from a Blue Wither Skull is capable of destroying Obsidian.
- Grief Protection: On multiplayer servers, Obsidian walls offer robust protection against intentional destruction.
- Nether Safety: Obsidian is completely immune to fire and lava damage. This makes it the perfect material for building safe pathways, temporary shelters, or permanent bases within the hostile environment of The Nether.
- Mobile, Blast-Proof Storage: Combine its blast resistance with an Ender Chest, and you have a secure, portable storage solution that can withstand almost any environmental hazard.
Mastering Obsidian: Pro Tips & Best Practices
To truly integrate Obsidian mechanics into your Minecraft workflow, keep these tips in mind:
- Always Carry a Water Bucket: When exploring underground or in The Nether, an empty bucket paired with a water source block (or a full water bucket) is your best friend. This allows you to instantly convert unexpected lava pools into readily minable Obsidian, or quickly deal with flowing lava hazards.
- Prioritize Efficiency V: As soon as you have an Enchanting Table and some experience, prioritize getting the Efficiency V enchantment on your best pickaxe (Diamond or Netherite). The time savings are immense, making all Obsidian-related projects much faster.
- Crying Obsidian for Respawn Anchors ONLY: Remember that while Crying Obsidian is visually similar, it cannot be used for Nether Portal frames. Save your Crying Obsidian specifically for crafting Respawn Anchors to set convenient spawn points in other dimensions.
- Consistency Across Editions: The core process for creating Obsidian (flowing water on a lava source block) is consistent across both Minecraft Bedrock and Java editions. While some advanced Redstone generator designs might differ due to subtle game mechanic variations, the fundamental interaction remains the same.
- Wind Charges for Mobility: If playing on newer versions, practice using Wind Charges for quick, safe traversal over lava. It's a skill that can save your life and greatly speed up lava-centric operations.
Your Obsidian Journey Ahead
From a simple block created by the fundamental interaction of water and lava to the cornerstone of interdimensional travel, advanced crafting, and formidable defense, Obsidian is far more than just another resource in Minecraft. By truly understanding Obsidian formation mechanics, you've gained a key skill that empowers you to progress further, build more securely, and explore every corner of the Minecraft universe with confidence. Now, go forth and solidify your place as a master of Minecraft's most resilient block!